其實安裝Apache很簡單,不過在架設Web Server的過程是必需的,
爾後會再Apache HTTP Web Server上再加上JSP Containter 連結Tomcat,來解析jsp程式,
國外已經有人把Apache HTTP Web Server、PHP Hypertext Preprocessor及Mysql全都整全在一起,方便安裝,
以下是各個Service的官網
Apache HTTP Web Server
PHP Hypertext Preprocessor
Sun Mysql
AppServ
http://www.appservnetwork.com/?modules=&applang=tw
以下開始安裝:
首先下載AppServ
AppServ 2.5.10
- Apache 2.2.8
- PHP 5.2.6
- MySQL 5.0.51b
- phpMyAdmin-2.10.3
Download
Sourceforge.net : http://prdownloads.sourceforge.net/appserv/appserv-win32-2.5.10.exe?download
下載2.5.10版本,這是比較穩定的版本,不過不是最新的,內容物如上
然後double Click程式
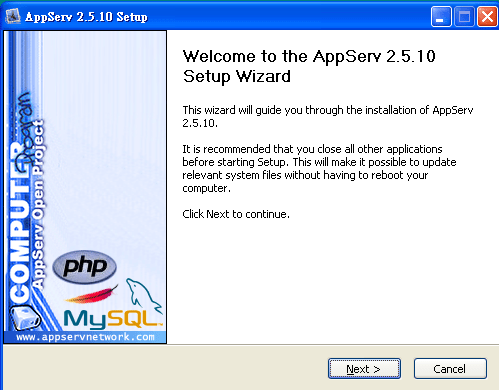
選Next

服務條款,選I Agree

選擇安裝路徑按Next

然後選擇要安裝的套件,基本上全選會比較方便使用,否則安裝好後還需要做點設定才可以,
建議全選,然後Next

還有你的Email及要使用的port,一般都是使用80 port

再來設定你的Mysql 管理者的密碼,這同時也會是你登入phpMyAdmin的密碼(Web化管理Mysql的工具)
這是我們把InnDB enable起來,當然事後再enable也可以,
編碼的部份Character Sets and Collations非常建議使用UTF-8 Unicode,省的以後開發程式時發生中文語系問題

然後就開始安裝啦

安裝好後,如果你有防火牆FireWall,記得要把對外的port 80打開,或解除封鎖

然後完成後,選Finish
Start Apache及Start MySQL我們都打勾


然後可以在,控制台->系統管理工具->服務 裡找到剛才選的二個服務已經啟動了

然後打開你的Browser,輸入http://localhost 或是http://yourdomain
就可以看上面畫面了。

你也可以輸入http://localhost/phpMyAdmin 或是http://yourdomain/phpMyAdmin
就會出現帳號及密碼的對畫框,帳號root,密碼則是剛才在安裝過程設定的MySQL密碼

這樣子就可以對MySQL做控制了
以上就是AppServ的安裝過程了
你好
當我完成到
”http://localhost/phpMyAdmin 或是http://yourdomain/phpMyAdmin
就會出現帳號及密碼的對畫框,帳號root,密碼則是剛才在安裝過程設定的MySQL密碼”
這裡時
卻出現
“phpMyAdmin – 錯誤
無法讀取 mysql 模組,請檢查 PHP 設定 – 說明文件”
請問我是在哪一個環節出了問題
請問appserv是什麼版本呢?
您的環境也是windows xp嘛?
如果依appserv包裝好的東西來安裝的話基本上全都設定好了
會比較建議用2.5版,而不是用2.6版
你可以改用這個版本看看
或著提供我您說的錯誤畫面或訊息給我…謝謝
經過好幾次的重新安裝
居然莫名其妙的完成了
真是詭異
謝謝你的回答^^
請問還要設定檔案位置嗎
不用!預設在安裝目錄的AppServ/www
如果需要多個sub domain時可以再來設
出現「phpMyAdmin – 錯誤,無法讀取 mysql 模組」
環境:
appserv-win32-2.5.10
Server 2003 (通常都是這個作業系統的問題)
我的解決辦法
1、將 C:\AppServ\php5php.ini-dist 複製至 C:\Windows 底下
2、將 C:\Windows 底下的 php.ini-dist 修改為 php.ini
3、將 php.ini 中的 ;extension=php_mysql.dll 改為 extension=php_mysql.dll 少了前面的 ;
4、重新啟動 Apache Restart